 Many people use screenshots to clip portions of their Mac screen for later reference. For example, you could save a screenshot of an error dialog to show tech support, store a confirmation number from a Web page, or keep a chat from social media. You can even record screen movies to show a developer how their app is misbehaving.
Years ago, Apple introduced a floating control bar that makes accessing features for taking screenshots and recording screen movies easier. The hardest thing about using the control bar is memorizing its keyboard shortcut: Command-Shift-5. (The even older shortcuts of Command-Shift-3 for full-screen screenshots and Command-Shift-4 for windows and portions of the screen also still work.)
Meet the Control Bar
Let’s take a quick tour of the control bar. The leftmost 🅧 button dismisses the bar (alternatively, press Esc). You can also drag next to the 🅧 to reposition the bar. You’ll use the following three buttons to take screenshots and the next two to record movies.
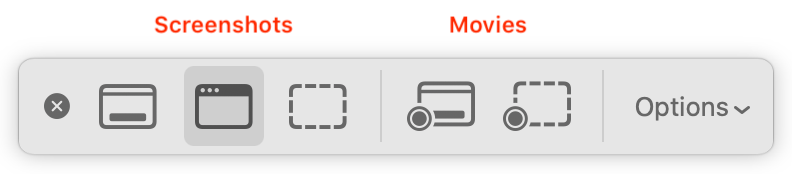
The Options button displays a pop-up menu. If you’ve selected a screenshot button, the menu offers screenshot-related choices; if you’ve clicked either movie button, you see recording choices.
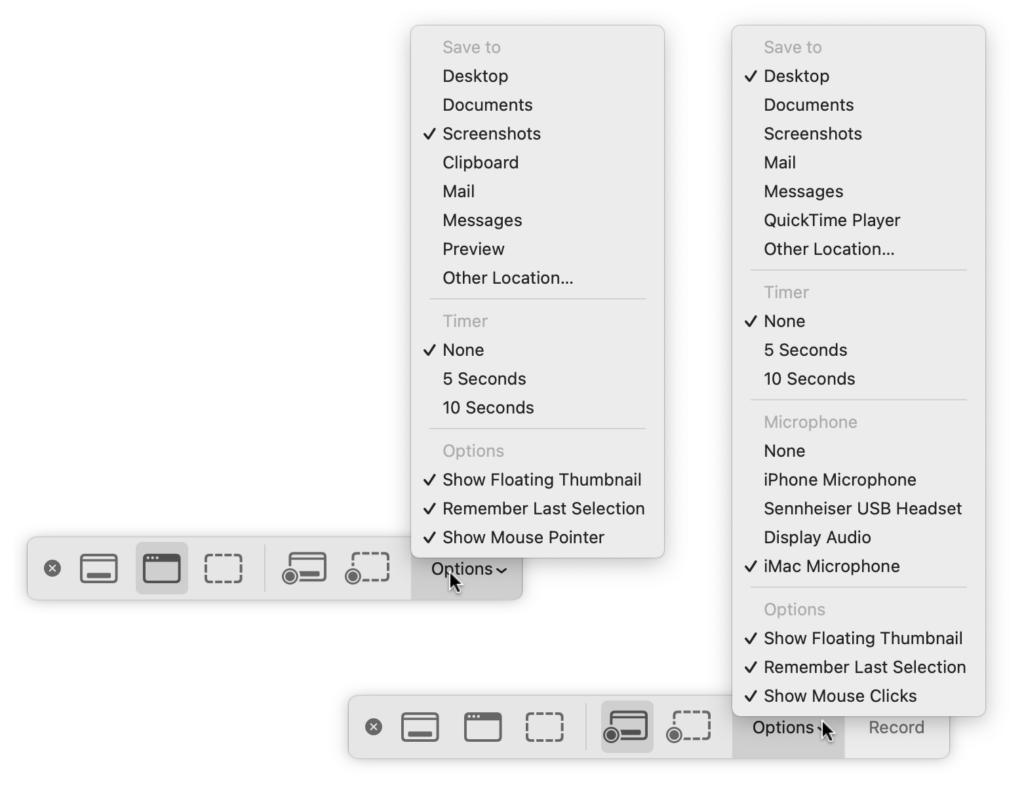
You may also see a Capture or Record button off to the right; more on them shortly.
Using the Options Menu
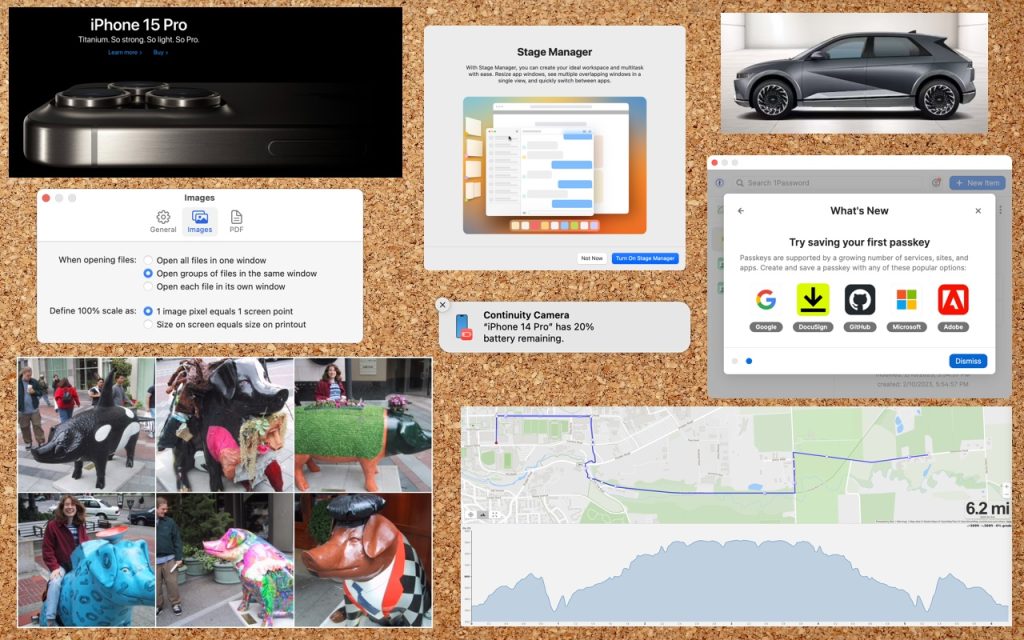
The top area of this menu, labeled Save To, enables you to choose a destination for screenshots or movies. By default, it’s set to the Desktop folder, which makes it easy to work with your screenshots right away, but your desktop can quickly get cluttered if you take a lot of screenshots. Feel free to choose Other Location and specify a folder of your choice, such as the Screenshots folder shown above.
If you choose an app like Mail, Messages, or Preview, a copy of your screenshot or movie will immediately appear in that app. For screenshots, you can also choose Clipboard to put a copy in the clipboard so you can paste it. Holding down the Control key while capturing a screenshot also puts the screenshot in the clipboard.
The Timer options let you adjust something on the screen immediately before your screenshot or movie begins. You can choose a 5- or 10-second delay. Timers are handy for situations where invoking the control bar would change the screen in an undesirable way.
With movies, you can record your voice over the action on screen. Select the desired microphone in the menu.
The bottom portion of the menu offers special options:
- With Show Floating Thumbnail, a small icon of a screenshot or movie appears temporarily in the lower-right corner of the screen after you take it. In the case of a screenshot, you can click this icon to mark it up, trash it, or share it; for a movie, you can crop it (useful if the start or end aren’t what you want), play it, delete it, or share it.
- Remember Last Selection is a big help when generating a batch of screenshots or movies using the same selection rectangle.
- To make your pointer appear in your screenshot, choose Show Mouse Pointer, and for movies, to display a circle where you click, choose Show Mouse Clicks.
Taking a Screenshot
Here’s how to take each type of screenshot:
- Capture Entire Screen: Click the leftmost screenshot button
 and move the pointer off the control bar. Click the screen. (If your Mac has multiple screens, click the one you want.)
 - Capture Selected Window: To limit your screenshot to just one standalone interface element—a window, dialog, or menu—click the second button
 and then click the desired item. If you want to capture a dialog separately from an app window behind it, press Command and move the pointer over the dialog. (To eliminate the drop shadow, press and hold Option as you click.)
 - Capture Selected Portion: To take a screenshot of an arbitrary portion of the screen, use the third screenshot button
 . Click it and then resize and reposition the selection rectangle over the desired area—note that it shows you the pixel dimensions of the selection. (Reposition the rectangle by moving it with the hand pointer that appears when you hover over it, and resize it by dragging any selection dot.) Finally, click the Capture button at the right of the control bar or press the Return key to create the screenshot.
The name of the resulting image will be “Screenshot” plus the current date and time. It will also be in PNG format. If you prefer JPEG format for all your screenshots, you can change the default by pasting the command below into Terminal. Change things back by repeating the command, replacing JPG with PNG.
defaults write com.apple.screencapture type JPG
Recording a Movie
The two screen recording buttons are also easy to use:
- Record Entire Screen: Click the first movie button
 and then the Record button at the right of the control bar. If you have two or more screens, clicking the Record button presents a menu from which you can choose which screen to record.
 - Record Selected Portion: Click the second movie button
 , then resize and reposition the selection rectangle over the recording area, just as with capturing a selection for a screenshot. When you’re ready, click the Record button.
When it’s time to stop recording, if you see a stop button on the menu bar to the right of the current app’s menu items, click it. If it’s hard to find, press Command-Shift-5 to bring up the control bar again, which will now offer a stop button. Or just press Command-Control-Escape.

Movies are named “Screen Recording” plus the date and time and will be in QuickTime movie (.mov) format using the H.264 codec.
With screenshots and screen movies, the sky’s the limit for what you can capture or record, whether it’s a funny autocorrect chat mistake, an important reservation number, or a movie of a buggy app to share with tech support.
(Featured image uses a background by iStock.com/Altinosmanaj)
Social Media: Screenshots and screen recordings are helpful for capturing things that happen on your Mac screen for later reference. The macOS screenshot control bar makes it easy to take screenshots and movies, and our handy guide helps you work with it.